Your boarding group is lining up, your backpack’s already heavy, and the hotel “gym” is a single treadmill facing a wall. Yet your body still craves real work—strength, sweat, and progress that doesn’t vanish every time you scan a boarding pass.
This isn’t about “staying active.” This is about staying powerful while you live out of a bag.
If you’re a traveler or digital nomad who refuses to trade deadlifts for desk sits, this guide is your field manual: smart, packable equipment, plus five practical tips to keep you strong while you chase new coordinates.
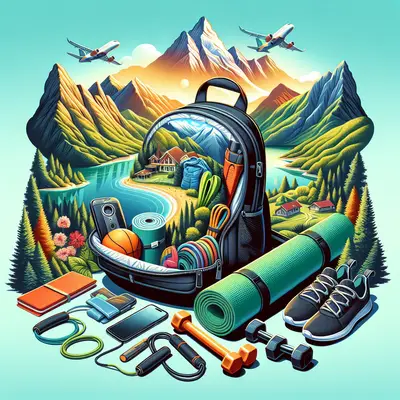
Building a Portable “Micro-Gym” That Fits in Your Backpack
Think of your luggage as a mobile training base. You don’t need a trunk full of gear—just a handful of tools that punch way above their weight and volume.
A solid portable micro-gym usually includes:
- Resistance bands (mini and long loop): They weigh almost nothing and can simulate cable machines, assist pull-ups, and add load to squats, hinges, and presses. Choose at least one light and one medium-heavy band.
- Suspension trainer or door-anchor system: A compact suspension kit gives you rows, presses, core work, and single-leg training using nothing but your body weight and a door, tree, or playground structure.
- Lightweight jump rope: For conditioning on the fly. It coils down to pocket size but can turn a 10-minute gap between Zoom calls into a legit sweat session.
- Collapsible or fabric “sandbag” shell: You fill it with clothes, towels, or even local sand or rice when you arrive. Suddenly, you’ve built a loadable object for cleans, squats, carries, and presses—then it packs flat when empty.
- Travel-friendly yoga mat or foldable mat: A thin mat makes floor work and mobility sessions easier anywhere—train on rough patios, airport carpets, or park grass without hating life.
Prioritize gear that is multi-use, light, and compressible. If a tool only does one exercise, it probably doesn’t earn its luggage space. Your guiding question: “Can this replace a whole corner of a gym?”
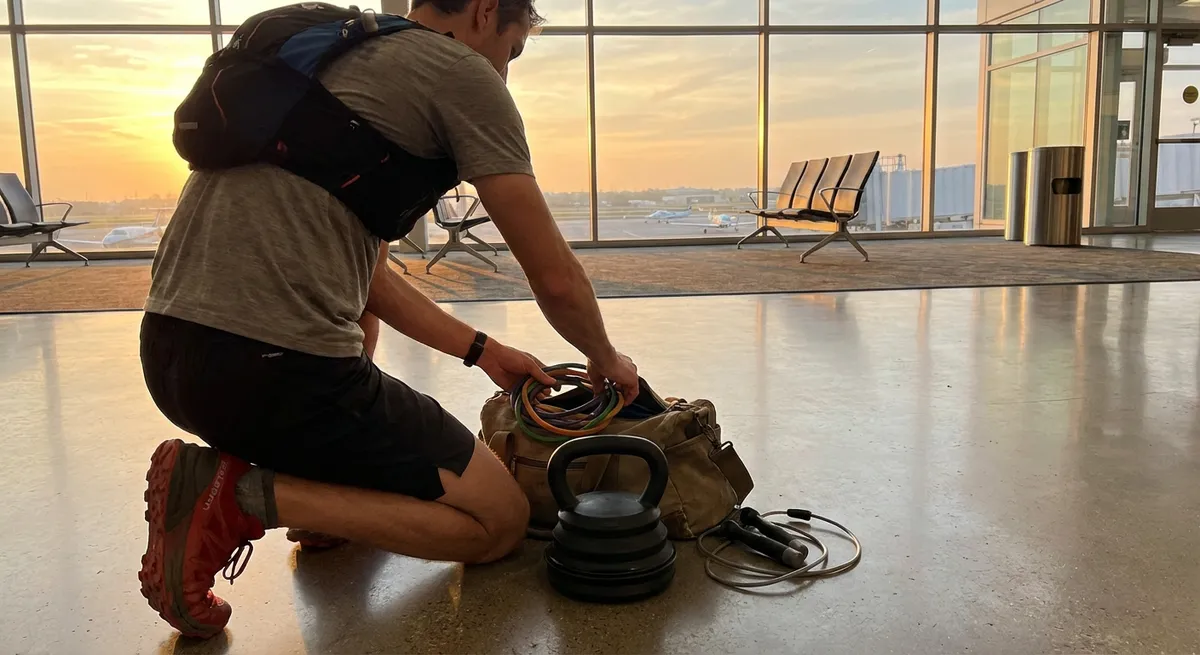
Deploying Your Gear in Tight Spaces (Rooms, Rooftops, and Terminals)
Most travelers overestimate space and underestimate improvisation. You don’t need a full hotel gym—just a few square feet and anchor points.
In hotel rooms:
- Use a door anchor at the top of the door for pulldown motions (lat pulldowns, face pulls), and at the hinge side for rows and presses.
- Attach bands under your mattress edge to create a makeshift low anchor for curls, rows, or kickbacks.
- If there’s a sturdy desk or bed frame, hook your feet under it for hamstring curls or use it as an elevated surface for decline push-ups and Bulgarian split squats.
Outdoors:
- Trees, railings, playground bars, and stairs are all fair game. A suspension trainer on a tree branch becomes your pull station. Stairs give you step-ups, sprints, and calf raises.
- If you have that collapsible sandbag shell, fill it with local material (sand, gravel in bags, or even stuffed clothes) and you’ve created a traveling barbell substitute.
In transit:
- Long layover? Find a quiet corner by an unused gate. Short sets of band pulls, squats, and calf raises can flush out stiffness.
- On trains or buses, micro-mobility (ankle circles, seated glute squeezes, neck rotations) and isometric holds (pressing palms together, static core bracing) keep your body from turning into a pretzel.
Treat each new city like a training playground: look for railings, steps, tree branches, and sturdy surfaces as soon as you check in or drop your bag.
Five Travel-Ready Fitness Tips for Stronger Miles
These five tactics tie your portable gear together and keep your training consistent despite time zones and check-in times.
1. Anchor Your Day with a “Non-Negotiable 15”
Instead of hunting for a perfect 60-minute window, commit to 15 minutes of focused work every day, anywhere.
Template with portable gear:
- 5 minutes: Jump rope or fast banded warm-up (band pull-aparts, air squats, arm circles)
- 8 minutes: Two strength movements alternated EMOM (Every Minute on the Minute):
- Odd minutes: Push-ups or band presses
- Even minutes: Squats or split squats with bands or a loaded backpack
- 2 minutes: Plank variations or dead bugs on your travel mat
Once this 15 is automatic, you can lengthen sessions when the schedule opens up—but your baseline never disappears.
2. Use Your Backpack as a Loadable Tool
Your backpack is more than a gear hauler—it’s your portable kettlebell:
- Fill it with clothes, books, or your laptop (if protected) to make it heavier.
- Hug it to your chest for goblet squats and walking lunges.
- Hold it by the top handle for rows and single-arm suitcase carries.
- Bear-hug it for loaded step-ups on hotel chairs (check stability first).
This turns “I only have my luggage” into “I have a scalable weight that travels with me.”
3. Program for Unpredictability, Not Perfection
Travel destroys perfect routines. Build a modular plan that survives chaos:
- Strength focus days: Use your suspension trainer, bands, and backpack for full-body compound moves (rows, presses, squats, hinges, single-leg work).
- Conditioning days: Jump rope intervals, stair sprints, brisk loaded walks with your pack.
- Mobility/recovery days: 20–30 minutes on your travel mat, focusing on hips, thoracic spine, and shoulders.
If flights get delayed or meetings stack up, slide the days around. The rule: never skip two training days in a row—swap duration or intensity instead.
4. Train “Location-Specific” Muscles
Different travel patterns stress your body in specific ways; program to counteract them:
- Frequent flyers: Combat tight hip flexors, upper back stiffness, and ankle swelling. Use bands for rows and pull-aparts, plus hip flexor stretches and glute bridges on the mat.
- Laptop nomads: Fight “tech neck” and rounded shoulders with banded face pulls, YTWI raises on the floor, and thoracic spine rotations.
- Urban explorers: If you’re walking all day, add short, intense strength sessions with your bands and backpack so your legs aren’t just doing endless low-intensity steps but still getting true strength stimulus.
This keeps “adventure fatigue” from turning into chronic aches.
5. Treat Sleep and Hydration Like Training Equipment
Your best band set won’t save you if you’re wrecked from red-eyes and street food.
Portable recovery tactics:
- Carry a collapsible water bottle and aim to hydrate as soon as you clear security or check into your stay.
- Pack a sleep kit: eye mask, earplugs, and maybe a travel-sized magnesium supplement (if it works well for you) to help with rest in noisy hostels or city centers.
- Minimal pre-sleep mobility (5–10 minutes of light stretching on your mat) signals your nervous system to downshift even in unfamiliar environments.
Think of sleep, hydration, and basic nutrition as invisible but essential pieces of your portable gym.
Packing Strategy: What Actually Deserves Space
Space in your pack is prime real estate. Here’s a practical way to decide what makes the cut.
High-priority keeps:
- 2–4 resistance bands (mix of mini and long loop)
- Compact suspension trainer with door anchor
- Jump rope
- Foldable mat (if you know you’ll be on hard floors often)
Optional add-ons (when you have a bit more room):
- Collapsible sandbag shell (for longer stays or road trips)
- Lightweight massage ball or lacrosse ball for self-massage
- Short foam roller or travel roller if you’re prone to tightness
Things to skip unless you have specific needs:
- Heavy dumbbells or fixed-weight tools that can’t compress
- Bulky ab wheels or single-purpose devices
- Large, thick mats that eat up half your carry-on
Do a quick test: Pack your typical travel load, then add your micro-gym. If it forces you to ditch essentials like a jacket or daily tech, trim your kit. Your goal is zero excuses, not zero comfort.
Conclusion
Strength doesn’t have to be tethered to a squat rack or a hometown gym membership. With a handful of smart, portable tools and a “train anywhere” mindset, every hotel room, rooftop, and quiet airport gate becomes part of your training territory.
Pack bands, a suspension trainer, and a jump rope. Turn your backpack into a weight. Lock in your daily 15 minutes, bend your programming around the chaos, and treat sleep and hydration like gear. That’s how you stay strong while your passport fills with stamps and your address keeps changing.
Your body doesn’t care if the work came from a chrome gym or a cramped hostel room—only that you showed up and did it.
Sources
- [American Council on Exercise – Resistance Band Training 101](https://www.acefitness.org/resources/everyone/blog/7634/resistance-bands-101/) – Overview of benefits, types, and effective use of resistance bands for strength training
- [Mayo Clinic – Exercise: 7 Benefits of Regular Physical Activity](https://www.mayoclinic.org/healthy-lifestyle/fitness/in-depth/exercise/art-20048389) – Evidence-based summary of why consistent exercise matters, including for travelers
- [Harvard Health – Why Stretching Is Important](https://www.health.harvard.edu/staying-healthy/why-stretching-is-important) – Explains how mobility and stretching support recovery, especially after long periods of sitting
- [Cleveland Clinic – Jump Rope Workout Benefits](https://health.clevelandclinic.org/jump-rope-workout/) – Details cardiovascular and conditioning benefits of jump rope training
- [CDC – Sleep and Chronic Disease](https://www.cdc.gov/sleep/about_sleep/chronic_disease.html) – Highlights the importance of adequate sleep for health and performance, relevant to recovery while traveling
Key Takeaway
The most important thing to remember from this article is that this information can change how you think about Portable Equipment.