Whether you’re chasing visas, volcanoes, or coworking day passes, your body is the one piece of gear you can’t replace on the road. Portable equipment turns any Airbnb, train platform, or beachside bungalow into a micro-gym—no membership, no excuses, no “when I get home” lag.
This guide walks you through smart, packable tools and five road-tested fitness tips to keep you strong, mobile, and adventure-ready without hauling a full duffel of gear.
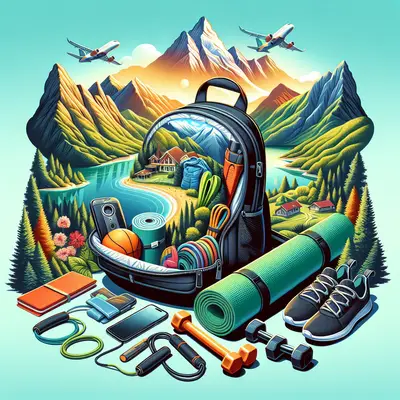
Building Your Mobile Micro-Gym
Forget giant dumbbells and clunky machines. A travel-ready training kit is about leverage, versatility, and weight-to-impact ratio.
Start with resistance bands (one light, one medium, one heavy). They weigh almost nothing, tuck into any backpack pocket, and can replicate pulls, presses, rows, and hip work you’d usually need a cable machine for. Look for loop bands for lower body and longer tube bands with handles for upper body.
Add a lightweight jump rope for conditioning and coordination. It’s more packable than running shoes and can turn a hotel balcony or parking lot into a serious cardio zone in ten minutes.
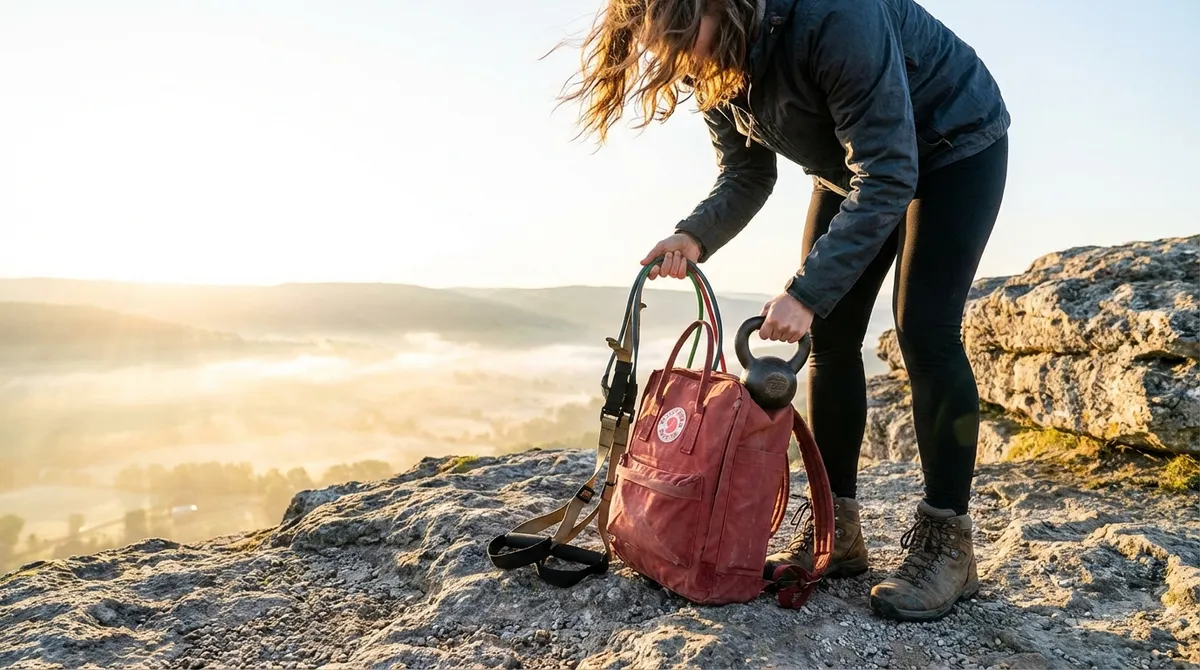
A set of compact suspension straps or door-anchor straps (think TRX-style) turns any solid door, tree, or railing into a full-body training station. Rows, pushups at angles, single-leg work, core training—suddenly you’ve got multi-planar strength, not just pushups on the carpet.
Round out your kit with one or two mini mobility tools: a small massage ball or lacrosse ball and a short stretch strap or yoga strap. After long bus rides and red-eye flights, this is how you unkink hips, back, and shoulders without hunting for a spa or physio.
Treat this micro-gym like your toothbrush: it lives in your bag, not on a shelf “just for some trips.” If it’s always within reach, training becomes a normal part of landing, not an optional extra.
Choosing Gear That Survives Borders and Baggage Scans
Portable gear needs to be more than light—it has to be rugged, discreet, and TSA-friendly.
Look for bands with reinforced seams and clear resistance ratings. Cheap bands snap faster in humid climates and strong sun. Flat loop bands should feel dense, not gummy; tube bands should have sturdy carabiners or molded handles, not flimsy plastic clips.
Your suspension trainer should be easy to anchor without tools. Pick a setup that includes:
- A door anchor with a wide stopper so it doesn’t slip through
- Adjustable straps with clear markings for length changes
- Metal or heavy-duty plastic buckles that don’t slip under load
For jump ropes, a coated steel cable or durable PVC rope usually survives rough concrete and asphalt better than cotton. If you’re tall, ensure the rope is adjustable without needing extra tools.
Security-wise, all of this is carry-on safe, but metal handles and carabiners might trigger extra screening. Keep them in an easily accessible pouch. If you plan to check your bag on rugged trips, pack gear inside clothing or shoes to protect it from sharp edges and extreme temps in cargo holds.
Let your packing rule be: one shoe box of gear, max. If it doesn’t fit in that volume, it’s not truly portable.
Five Fitness Tips for Travelers and Digital Nomads
These tips are built around portable gear but grounded in the reality of border crossings, odd schedules, and inconsistent Wi-Fi.
1. Anchor Your Day With a 15-Minute “Arrival Circuit”
As soon as you drop your bag (before you sit or scroll), run a short full-body circuit with your portable gear. For example:
- 10–15 band rows (anchored in a door or around a railing)
- 10 pushups (floor or suspension straps)
- 10 band or backpack goblet squats
- 20 seconds of jump rope
- 20–30 seconds of a band-resisted dead bug or plank
Repeat 2–3 rounds with minimal rest.
Why this works on the road:
- It flushes out stiffness from travel.
- It signals your brain: “New place, same body routine.”
- It’s short enough to do before showers or dinner reservations, even when jet-lagged.
Make this a non-negotiable arrival ritual. Different city, same circuit.
2. Train Patterns, Not Muscle Groups
When your environment changes daily, split routines (chest day, back day) fall apart. Instead, organize sessions by movement patterns you can train with portable gear:
- Push: pushups, band chest presses, overhead presses with bands
- Pull: rows with bands or suspension straps, face pulls, pulldowns anchored high
- Hinge: banded deadlifts, good mornings, hip hinges
- Squat/Lunge: band-resisted squats, split squats, reverse lunges
- Core/Carry: planks with band pulls, suitcase holds with a loaded backpack, banded anti-rotation presses
- Aim for two or three full-body sessions per week.
- Each session: hit push, pull, lower body, and core for 2–4 sets each.
- Vary tempo (slow eccentrics, pauses) or band resistance instead of hunting for more machines.
On a tight travel schedule:
This keeps your training consistent whether you’re in a modern hotel gym in Lisbon or a basic guesthouse in Laos.
3. Use Your Backpack as a Load, Not Just Luggage
Your pack is hidden resistance. Combine it with portable gear to make strength work feel substantial without iron.
Ways to use it:
- Weighted squats and split squats with your backpack hugged to your chest
- Backpack rows: hinge at the hips and row the pack to your lower ribs
- Loaded step-ups: onto a sturdy step, bench, or curb
- Farmer walks: heavy tote or duffel in one hand for core and grip
- Loop a band under your feet and around the backpack handle while you squat for extra resistance at the top.
- Combine a suspension row with your backpack on to add load.
Upgrade the effect with bands:
Adjust the weight with water bottles, books, or food—things you’re carrying anyway. You’re turning everyday travel mass into training mass.
4. Cycle Intensity With the “Travel Triangle”
Nomad life isn’t predictable, so your training shouldn’t rely on perfect conditions. Use a simple three-mode system based on your current situation:
Mode A: Transit / Jet Lag (Low Load, High Mobility)
- 10–20 minutes of light bands, mobility flows, and walking
- Focus on hips, thoracic spine, calves, and neck
- Goal: circulation and joint relief, not max effort
- 25–40 minutes, full-body band and suspension work
- 3–4 sets per pattern, 6–12 reps
- Add intensity via band thickness, tempo, and unilateral work
- 8–15 minutes before hikes, dives, or long tours
- Dynamic warm-up: band pull-aparts, light squats, hip openers, core bracing
- Goal: prime joints and stabilize before the big activity
Mode B: Normal Workdays (Strength Emphasis)
Mode C: Adventure Days (Quick Primers)
Instead of skipping workouts when schedules explode, you shift modes. The gear stays the same; the dial changes.
5. Protect Joints Like You Protect Your Passport
Travel hammers your body—long sits, odd beds, sudden hikes. Portable gear is your insurance policy, but only if you use it to support joint health, not just sweat.
Make these non-negotiables:
- Daily band pull-aparts or face pulls for shoulder health (2–3 sets of 15–25)
- Ankle and calf work with light bands after flights or bus rides
- Hip mobility flows: banded hip flexor stretches, glute bridges with a mini-band
- Short core sessions: anti-rotation holds, planks with band rows, dead bugs
- Shift to higher reps with lighter tension for a few days.
- Increase mobility and activation work in that area.
- Keep training other patterns that don’t aggravate it.
When you feel a niggle:
Strong joints mean you can say yes to last-minute treks, surf lessons, or citywide walking days without worrying your body won’t cash the check.
Weaving Training Into the Nomad Rhythm
Portable equipment doesn’t replace mountain summits, city walks, or long surf sessions—it supports them. Think of your travel micro-gym as:
- Your pre-flight armor (mobility and activation before long sits)
- Your post-arrival reset button (short circuits to claim a new place)
- Your rainy-day backup plan (strength when adventures get rained out)
Keep your kit small, your sessions flexible, and your standards high. You don’t need a stable address to build a stable, capable body—just a handful of smart tools and the commitment to deploy them wherever you drop your pack.
Sources
- [American Council on Exercise: Resistance Band Training Benefits](https://www.acefitness.org/education-and-resources/lifestyle/blog/6643/ace-sponsored-research-can-resistance-bands-compare-to-free-weights/) - Research and expert insight on how resistance bands compare to traditional weights
- [Mayo Clinic: Fitness Basics for a Balanced Routine](https://www.mayoclinic.org/healthy-lifestyle/fitness/in-depth/fitness/art-20045506) - Overview of key fitness components (strength, flexibility, endurance) relevant for structuring travel workouts
- [Centers for Disease Control and Prevention – Physical Activity Guidelines](https://www.cdc.gov/physical-activity-basics/guidelines/adults.html) - Evidence-based weekly activity recommendations for adults
- [Harvard Health Publishing: The Importance of Strength Training](https://www.health.harvard.edu/staying-healthy/why-strength-training-is-so-important) - Explains long-term benefits of strength work, especially useful for frequent travelers
- [Cleveland Clinic: Joint Health and Mobility Tips](https://health.clevelandclinic.org/how-to-improve-joint-mobility/) - Practical strategies for protecting joint health, applicable to high-movement lifestyles
Key Takeaway
The most important thing to remember from this article is that this information can change how you think about Portable Equipment.