If your passport gets more stamps than your gym keycard, you’re in the right place. Being constantly in motion doesn’t mean your fitness has to wander off too. With the right portable gear and a few smart tactics, you can stay strong, mobile, and adventure-ready whether you’re chasing sunsets in Lisbon or Wi‑Fi in a Bali café. This is your practical, packable guide to turning any stopover into training ground zero—without hauling a trunk of equipment.
Building a “Trailblazer Toolkit” That Actually Fits in Your Bag
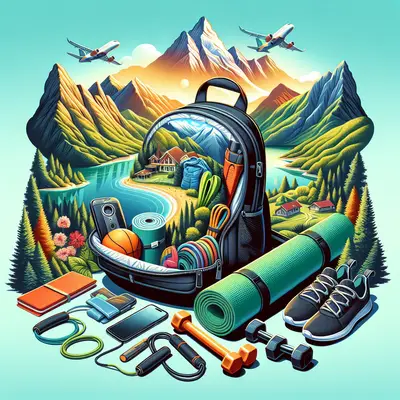
Portable equipment only works if you actually bring it. That means light, durable, and multi‑purpose. Think of your setup as a modular toolkit, not a full gym in miniature. A few pieces that combine well will serve you better than ten single‑use gadgets you never unpack.
Start with resistance bands that have different levels of tension; they’re essentially a mobile cable machine for rows, presses, pull‑aparts, and hip work. Add a lightweight suspension trainer or similar strap system that can anchor to a sturdy door or beam for rows, pushups, and single‑leg work—this instantly upgrades any cramped room or quiet park. A compact jump rope gives you a reliable cardio option when you don’t know if the local area is run‑friendly or safe before sunrise. From there, sprinkle in one or two “luxury” items based on your body’s needs: a small massage ball for tight hips and feet, or a foldable yoga mat if you spend hours on buses and planes. Keep everything in one dedicated pouch in your backpack so setting up a workout never becomes a scavenger hunt.
Core Gear: What Earns a Spot in Your Carry‑On
Not all gadgets earn carry‑on real estate. The gear below delivers the most “training value per cubic inch” when you’re bouncing between cities, clients, and co‑working spaces.
A mixed set of resistance bands (loop bands plus longer tube or flat bands) lets you load nearly every movement pattern: squats, hinges, presses, pulls, and rotation. They also double as mobility tools to open up your shoulders and hips after long travel days. A door‑anchor strap or suspension trainer––even a minimal one––turns any solid doorway into a vertical gym, giving you angles and leverage you just can’t get with floor‑only work. Jump ropes are time‑efficient: a few minutes of intervals can rival a longer jog and work well in courtyards, rooftops, and garage levels.
If you’ve got a little extra room and weight tolerance, a collapsible water bag or sandbag shell can be filled with water, sand, or gravel on arrival, then emptied before you move on. This creates a load‑bearing tool for carries, cleans, squats, and presses without violating airline weight limits. Round it out with a compact lacrosse‑style ball and mini‑foam roller (or a foldable mat) to undo the damage from economy seating and co‑working chairs. The litmus test: if you can’t name at least five solid exercises it enables, it probably doesn’t deserve a seat on your next flight.
5 Adventure-Ready Fitness Tips for Travelers and Digital Nomads
Tip 1: Train by Time, Not by Location
Travel days wreck schedules, not motivation. Instead of clinging to a “gym‑only” mindset, commit to time blocks: 15–20 minutes of focused work, wherever you are. Use EMOM (Every Minute On the Minute) or AMRAP (As Many Rounds As Possible) formats with your portable gear—pushups plus band rows, squats plus band presses, or jump rope intervals plus core. When your rule becomes “I move daily for at least 15 minutes,” you stop waiting for the perfect setup and start training inside imperfect ones.
Tip 2: Anchor One Non‑Negotiable Movement Pattern
Pick one movement pattern you refuse to skip on the road—push, pull, squat, hinge, or carry—and find at least two variations you can do with your current gear. For example, if you choose “pull”: suspension rows on a door plus band pull‑aparts for posture. If “hinge”: banded Romanian deadlifts plus hip bridges on the floor. This non‑negotiable focus keeps your training consistent while everything else in your life changes zip codes.
Tip 3: Turn Transit into a Mobility Mission
You don’t have to wait until you reach the hotel to start feeling human again. Long flights and bus rides are prime time for “micro mobility.” Keep a small band and massage ball in your personal item and work on ankles, hip flexors, and upper back while you wait at gates or sit on trains. Ankle pumps, seated hip external rotation stretches, band pull‑aparts, and gentle neck movements counteract the rounded, compressed posture of travel. Think of it as stealth maintenance that protects your bigger training sessions.
Tip 4: Use Your Surroundings as “Bonus Equipment”
Portable gear is your base camp, but your environment is the wild playground. Benches become step‑up and split‑squat stations. Sturdy railings or low branches serve as row or inverted pushup anchors. Stairs or steep hills transform into brutal conditioning tools when you pair them with bands for added resistance. Before you declare “no place to work out,” scan your surroundings for edges, ledges, steps, bars, and open space. Your portable kit plus a curious eye turns a random alley or courtyard into a functional training zone.
Tip 5: Sync Your Training to Your Trip’s Energy Curve
Different phases of travel call for different training intensities. On heavy travel days with early flights or tight deadlines, lean on short, gear‑light circuits: bodyweight plus a single band for 10–15 minutes just to keep your streak alive. On “settled” days in a new city, go heavier with your portable load—fill that water bag, do longer suspension circuits, or push jump rope intervals. When you’re tackling physically demanding adventures (hikes, surf sessions, urban exploring), use your kit for lighter recovery work: band mobility, breathing drills, and gentle core instead of maximal workouts. This keeps you progressing without burning out halfway through your trip.
Sample “Anywhere Circuit” With Only Portable Gear
To see how all of this fits together, here’s a versatile circuit you can run in a studio apartment, hostel common room, or quiet park. All you need is a medium‑tension resistance band and a suspension trainer or door strap (swap for bodyweight variations if needed).
Perform this as an AMRAP in 15–20 minutes with controlled, deliberate reps:
- Suspension Rows – 8–12 reps (or band rows around a stable anchor)
- Band-Resisted Squats or Split Squats – 8–12 reps each leg
- Pushups (feet elevated on a step if you’re advanced) – 8–12 reps
- Band Good Mornings or RDLs – 10–15 reps
- Jump Rope or High‑Knee Marches – 30–45 seconds
- Plank with Band Row (one arm at a time) – 6–8 rows per side
Rest 30–45 seconds between rounds if needed. Travel days beating you up? Halve the reps and run it for one or two easy rounds just to maintain rhythm. Energy high and schedule wide open? Extend to 25 minutes and push the pace without sacrificing form.
Keeping Your Kit Light, Legal, and Long-Lasting
Adventurous doesn’t have to mean reckless. When you’re hauling equipment across borders, think about security, regulations, and durability. Avoid anything that looks like a weapon on X‑ray—skip heavy metal bars, tactical‑looking chains, or anything with concealed compartments. Soft, flexible items like bands, suspension straps, and empty water/sand bags generally breeze through checkpoints.
Inspect your gear regularly; heat, sun, and rough surfaces can weaken bands and straps over time. A snapped band mid‑rep in a hotel room is inconvenient; a snapped band near your face is dangerous. Rinse and fully dry anything you fill with water or sand to prevent mold and odor. Finally, respect local spaces—don’t anchor to fragile structures, busy railings, or anything that might damage property or put you or others at risk. Your goal is to leave each place stronger than you found it—your body included.
Conclusion
Portable equipment isn’t about recreating your home gym in miniature; it’s about giving yourself just enough firepower to stay strong, mobile, and ready for whatever the next border crossing throws at you. With a smart “trailblazer toolkit,” a few non‑negotiable movement habits, and the willingness to use your surroundings creatively, you can keep your training as consistent as your curiosity. Pack light, move often, and let your fitness travel as far as your passport.
Sources
- [American Council on Exercise – Resistance Band Training 101](https://www.acefitness.org/resources/pros/expert-articles/5511/resistance-band-training-101/) – Overview of benefits, safety, and exercise ideas for band training
- [Harvard T.H. Chan School of Public Health – Benefits of Physical Activity](https://www.hsph.harvard.edu/nutritionsource/benefits-physical-activity/) – Evidence-based summary of why consistent movement matters, even in short bouts
- [Mayo Clinic – How Much Exercise Do You Really Need?](https://www.mayoclinic.org/healthy-lifestyle/fitness/in-depth/exercise/art-20048389) – Guidelines on time-efficient workouts and weekly activity recommendations
- [Cleveland Clinic – Jump Rope Benefits](https://health.clevelandclinic.org/jump-rope-workout) – Details on cardiovascular and coordination benefits of jump rope as a compact training tool
- [Transportation Security Administration (TSA) – What Can I Bring?](https://www.tsa.gov/travel/security-screening/whatcanibring/all) – Official rules on items allowed in carry‑on and checked luggage, helpful for choosing travel‑safe fitness gear
Key Takeaway
The most important thing to remember from this article is that this information can change how you think about Portable Equipment.